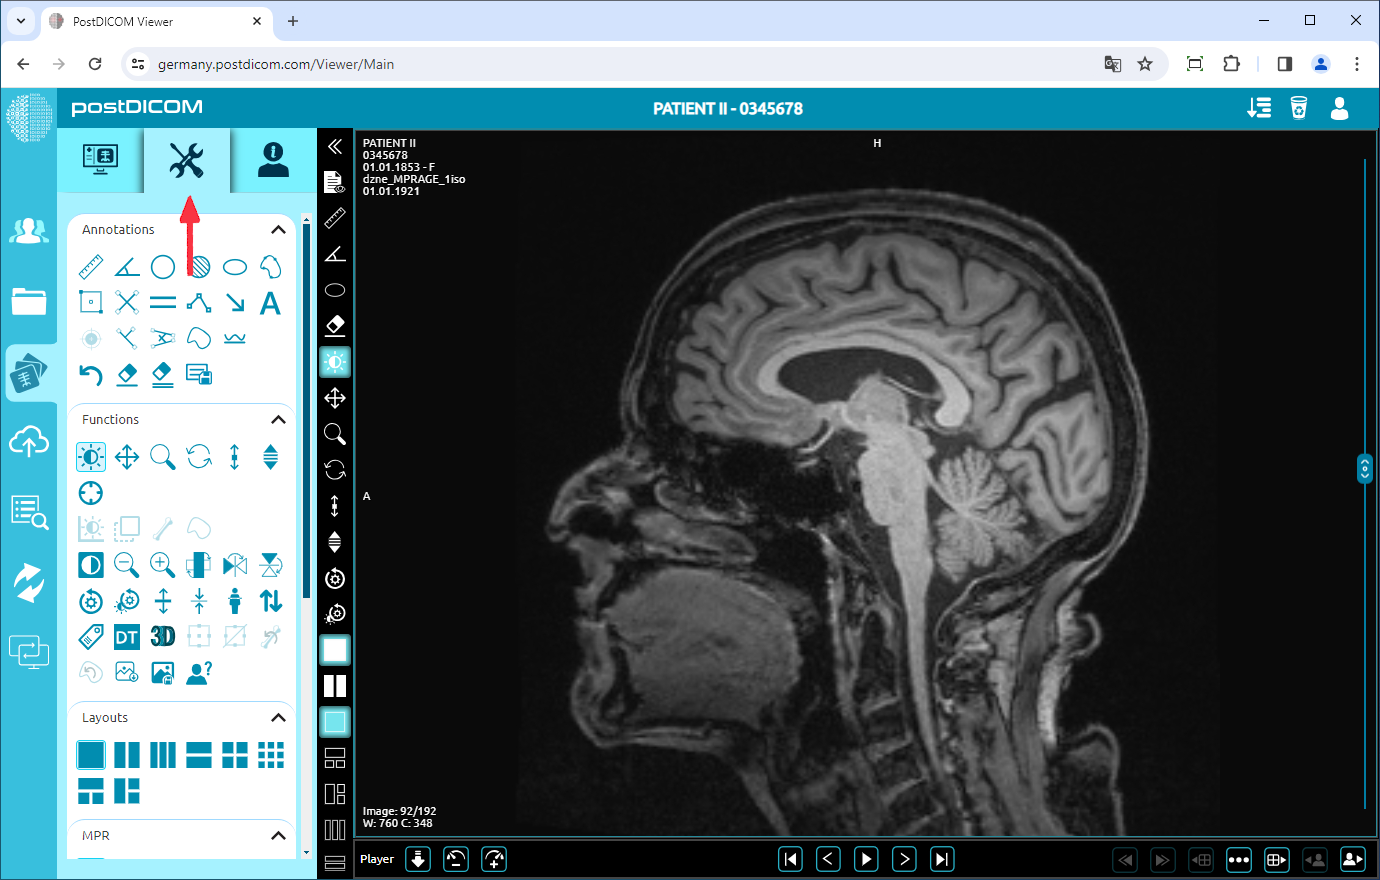
On the “Patient Search” page, all patient orders at your account will be displayed. Double click on the order you want to view the images. “View” page will be opened. Click on “Tools” icon on the upper left side of the page.
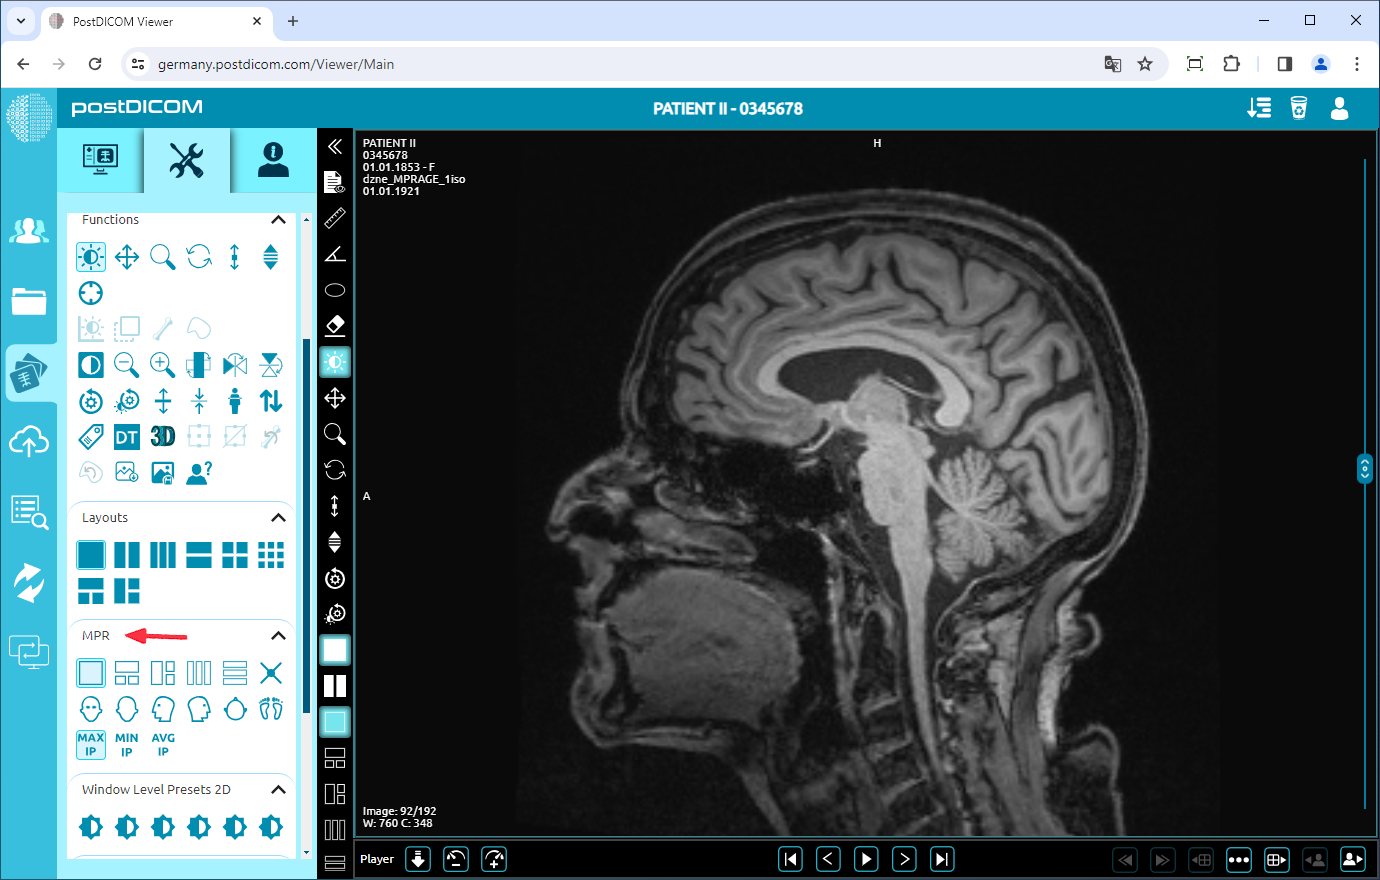
You will see the MPR field on the lower side of the tools section. You can select the image sequence on the viewport, change the image location, and adjust the intensity projection of the image by using the icons in the MPR field.
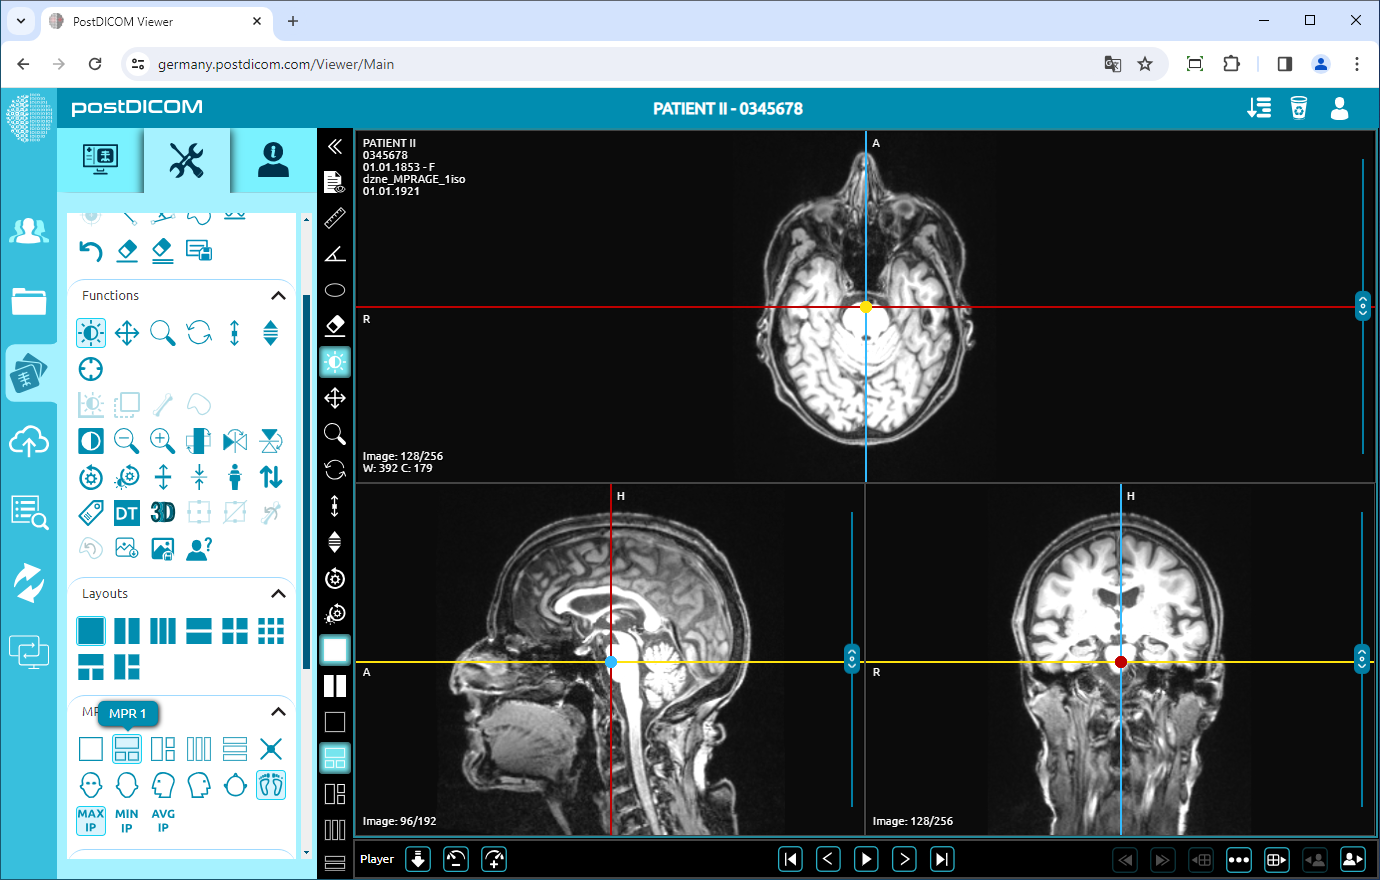
To select the image sequence, click on the icons on the first row of the field. Click on the “Oblique” icon for a single image, the “MPR1” icon for 1+3 vertical image sequence, the “MPR2” icon for 1+3 horizontal image sequence, and the “MPR3” icon for 2+2 image sequence. If you click on the MPR1 icon, you will see the following view. The original image will be displayed at the top.
Any editing on any image on the viewport will be applied to the other images.
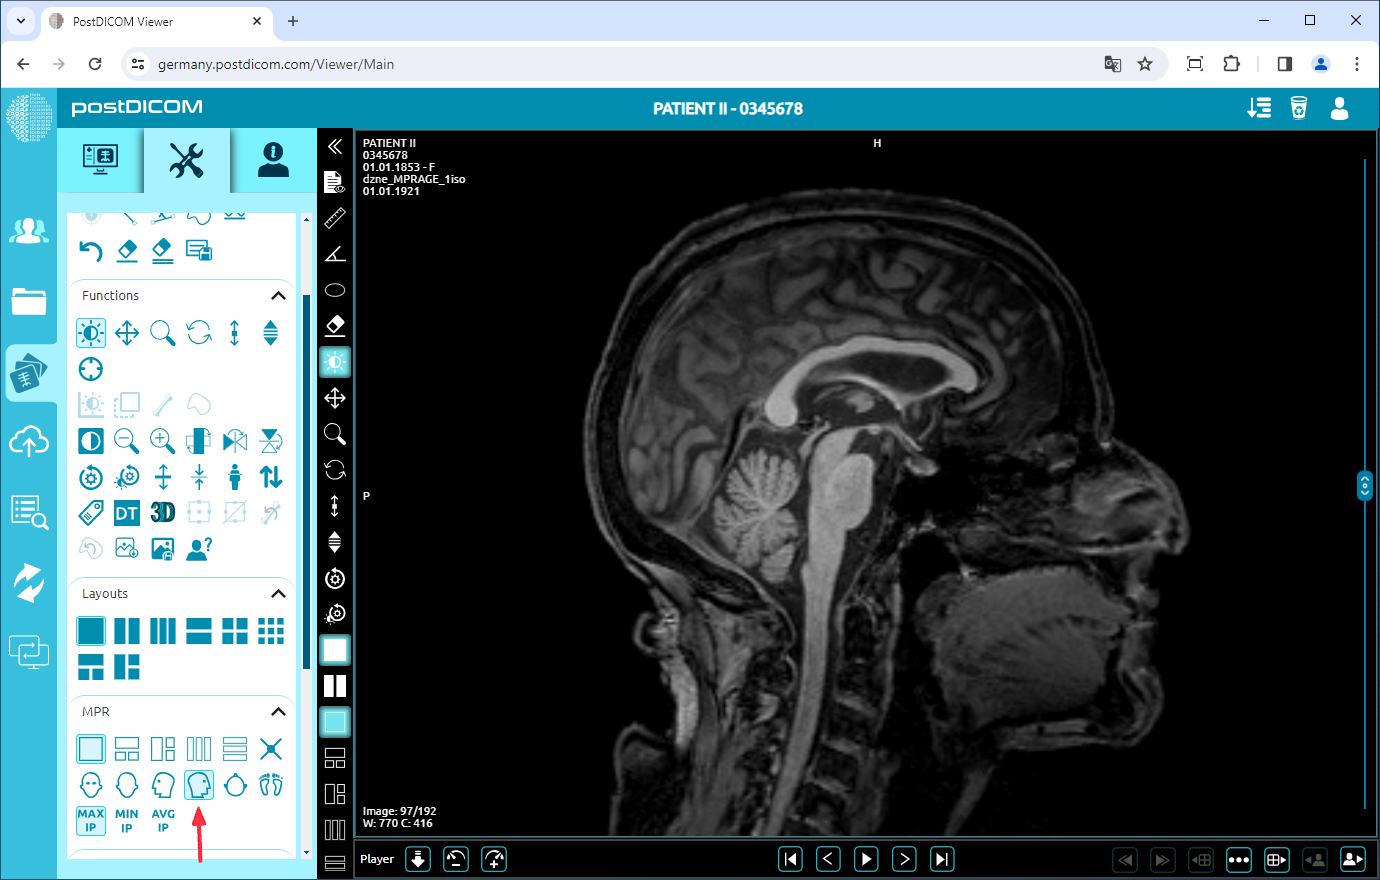
You can change the image location by using the icons in the middle row in the MPR field. Click on the “Front” icon to see the front perspective of the image, the “Back” icon to see the back perspective of the image, the “Left” icon to see the left perspective of the image, the “Right” icon to see the right perspective of the image, “Top” icon to see the top perspective image and “Bottom” icon to see the bottom perspective of the image. You can also determine the image position from the shape of the icon.
The following screenshot shows the right perspective of the image.
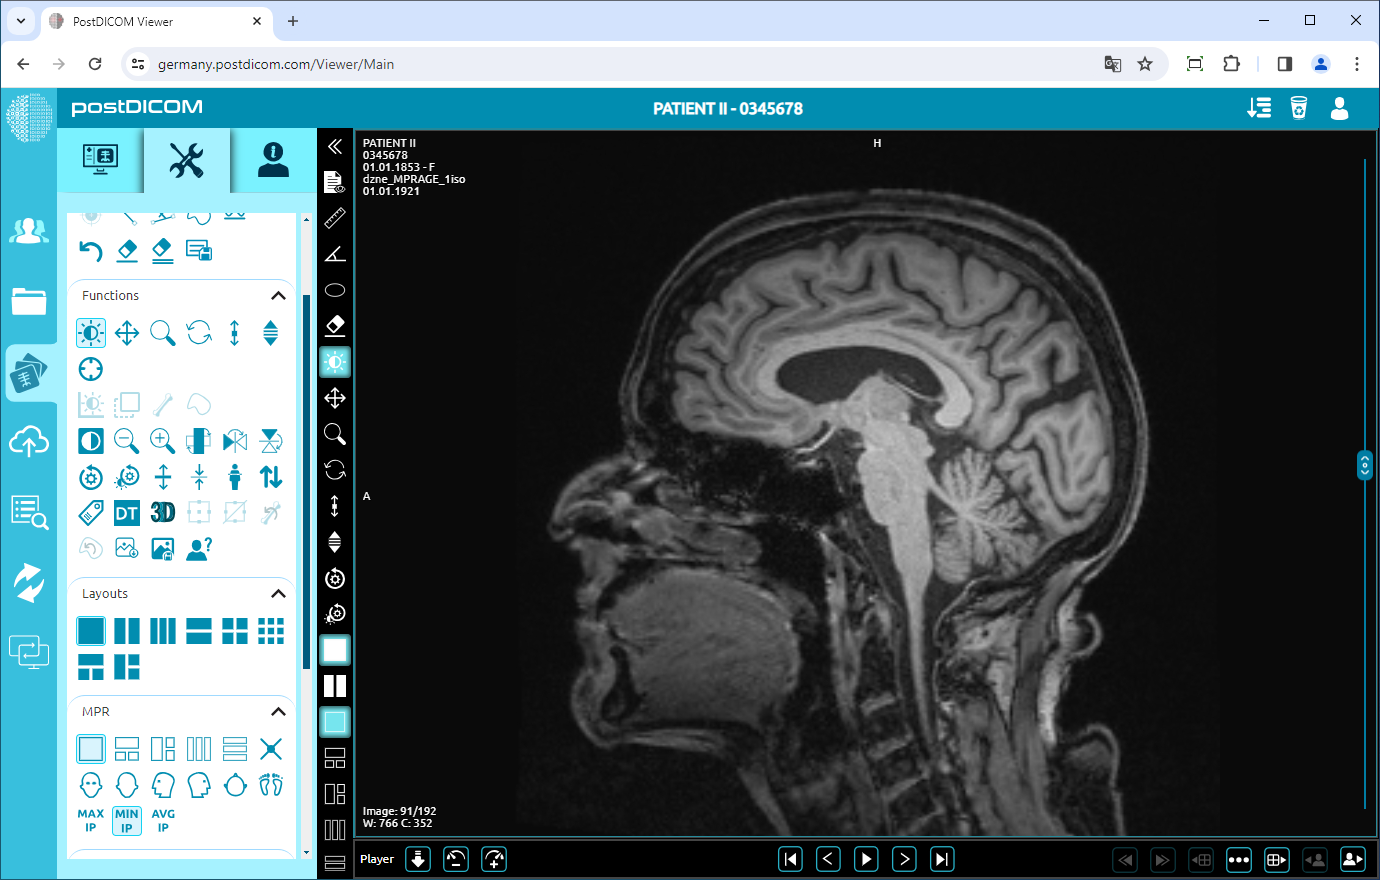
To adjust the intensity projection of the image, use the icons at the bottom row of the MPR field. Click on the “MIP” icon for the maximum IP, the “MINIP” icon for the minimum IP, and the “AVGIP” icon for the average IP. The following image shows the minimum IP.