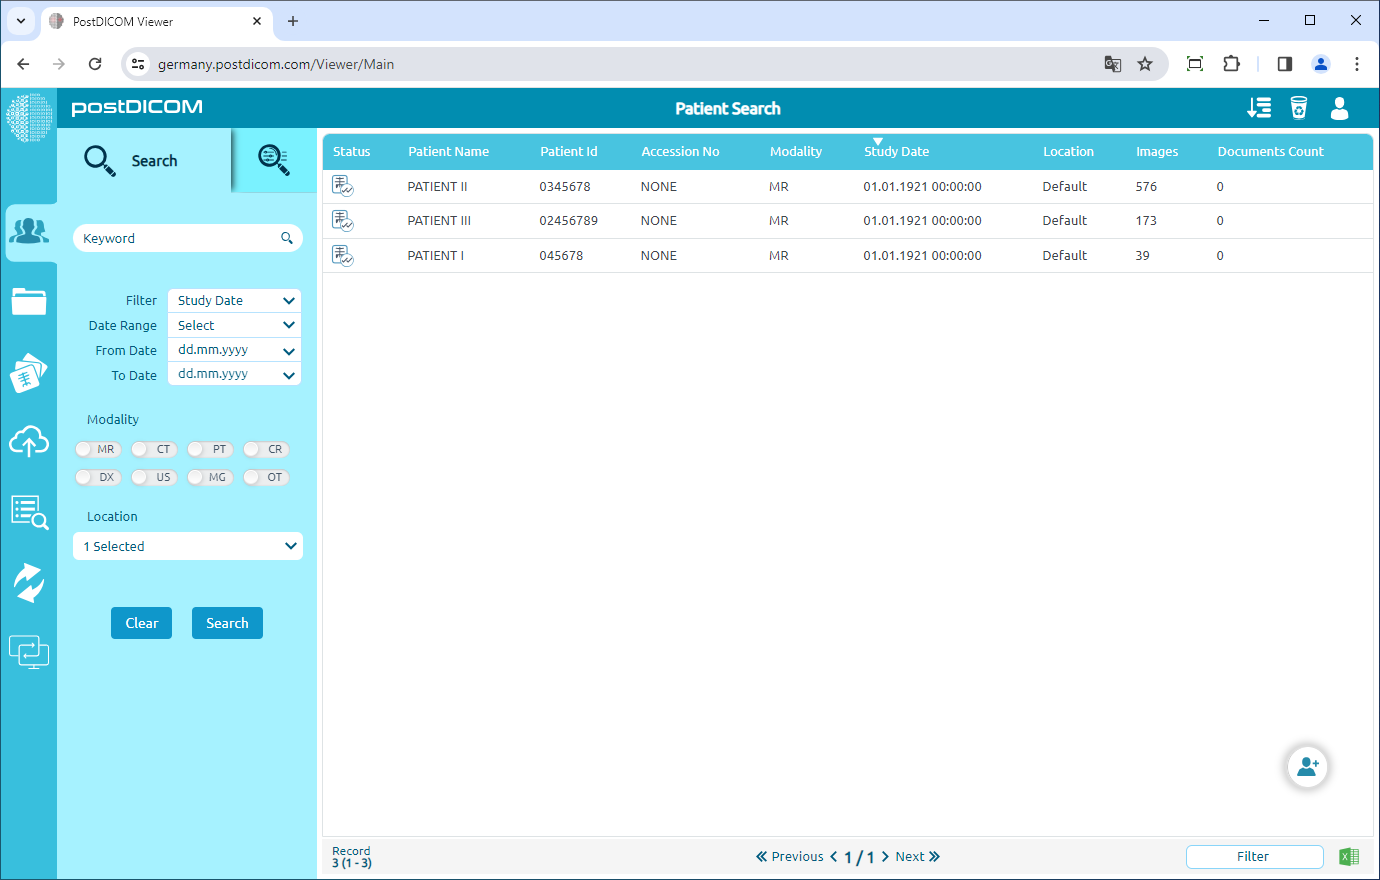
On the "Patient Search" page, you will see all patient orders in your account with patient name, patient ID, accession no, modality, study date, location, images count columns, and documents count information.
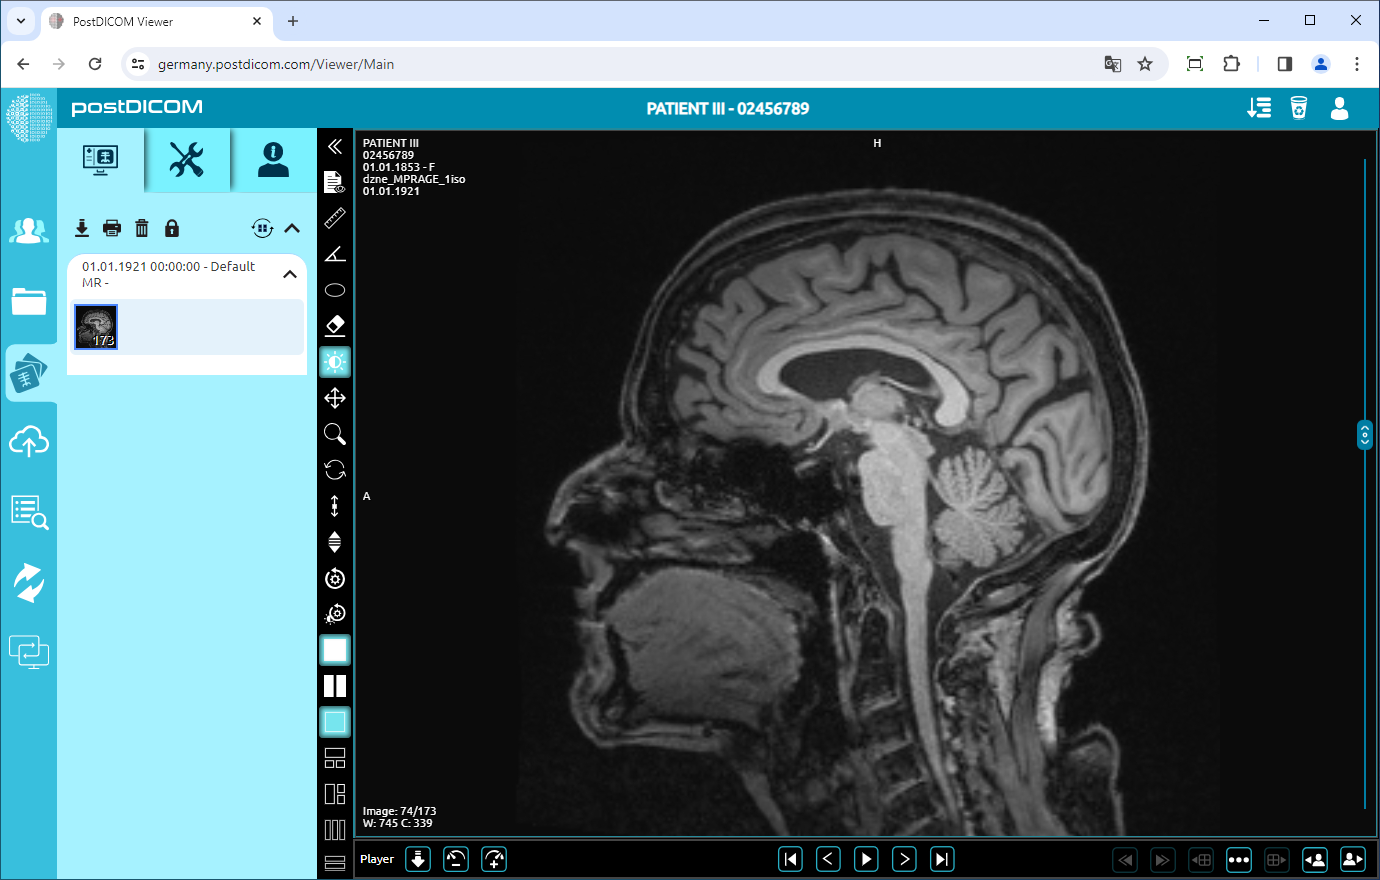
Double-click on the order you want to view the images. The “View” page will be opened.
You will see all the orders of the selected patient on the left side of the page by date order. The current order of the patient will be displayed on the top of the field and previous orders will be arranged under this order. You can see the date, time, and modality information at the top of each order.
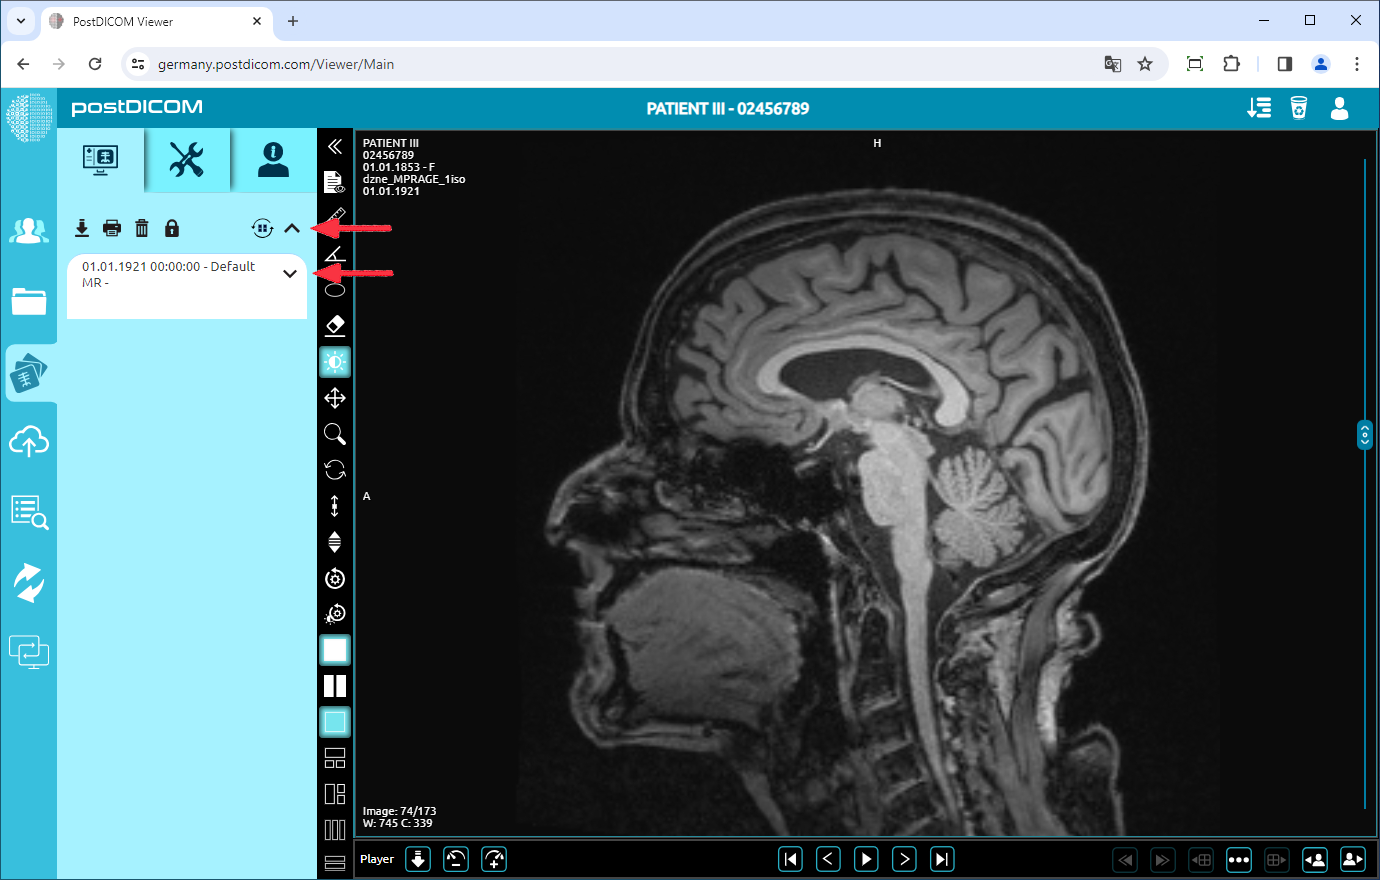
All the images and documents added to the order will be displayed under the order information. You can see the series of images or documents in any order by clicking on it. You can hide an order by clicking the arrow button on the upper right side of it or you can hide all orders by clicking the arrow button on the upper left side of the field. After you hide the orders, you will only see the order information.
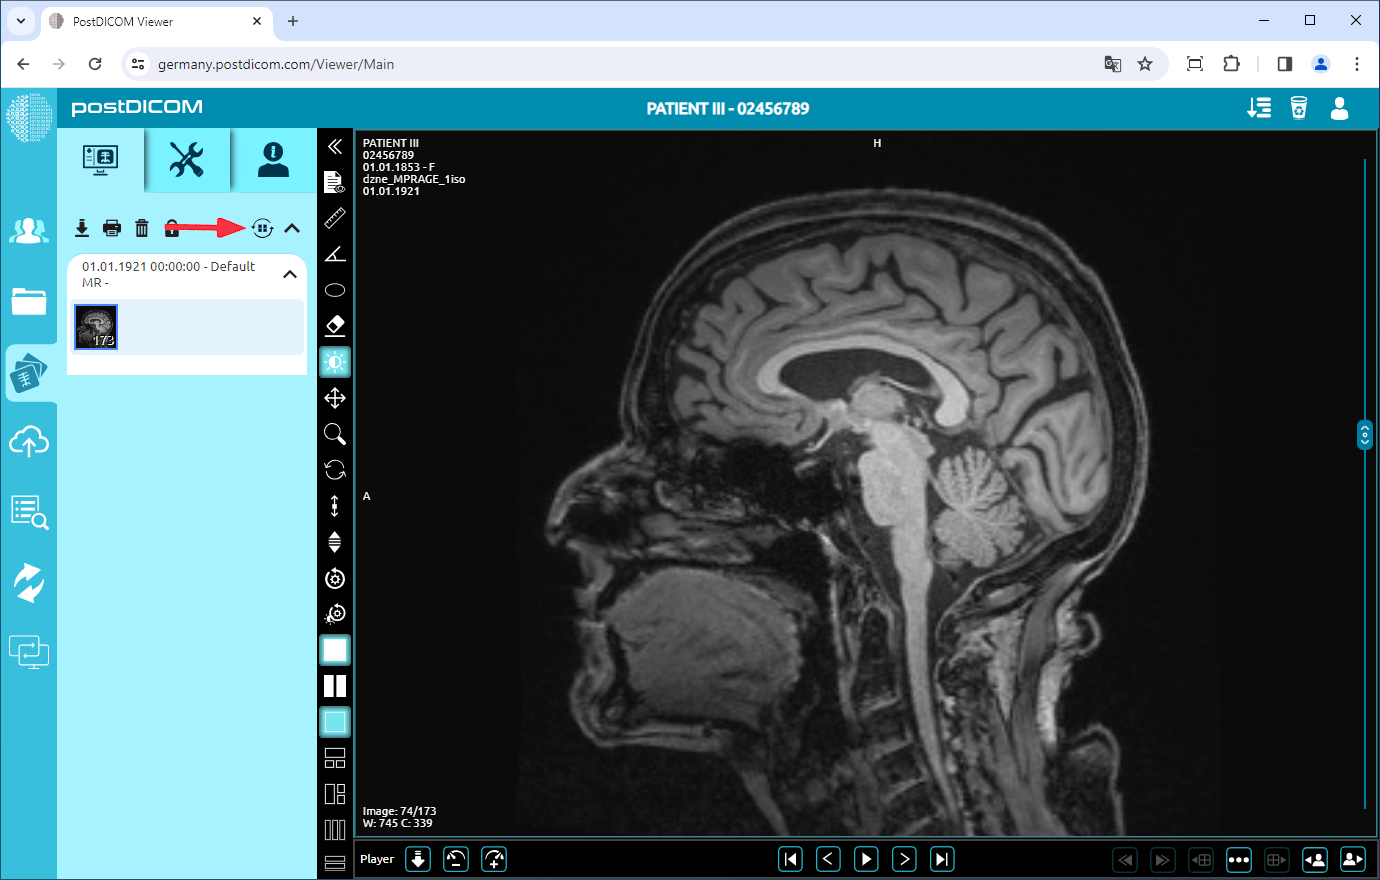
If you want to refresh the field, click on the "Refresh" button on the upper left side of the field.